
Ahh Japan and its beautiful cities, architecture, landscape, culture and crafts. It’s one of the country that inspire me the most, but you probably noticed that already. And this pattern is a perfect example of it, because today I’m going to show you how you can make an adorable crochet Shoji Lamp to decorate your room, office, house… You might need some extra, non crochet related, stuffs. So let’s see what we will need first, to make our own crocheted Shoji Lamp.
Material – How to make a crochet Shoji Lamp
- a 3 mm and 5 mm crochet hooks
- Worsted cotton yarn (brown color and 200 gr)
- Amigurumi cotton DK yarn (pink)
- Plastic pvc recycled package or any clear and sturdy transparent plastic panel x4
- Tracing paper or white baking paper
- Some cardboard (3 mm of thickness)
- DMC thread 814 – dark garnet
- Fiberfill polyester for stuffing
- a light, you can use candle light or garland lights
- Optional: sewing clips
** The words highlighted in blue are direct links to products on Amazon.com. As an Amazon Associate, I earn from qualifying purchases. This means that when you click on links to various products on this site and make a purchase, this can result in a commission that is credited to this site. This helps support the maintenance and growth of Atelierdelilah.Com, at no additional cost to you. Thank you for your support! **
Abbreviations
ch : chain
sc : single crochet
hdc : half double crochet
dc : double crochet
tr : treble crochet
sl st : slip stitch
picot3 : chain 3 then slip stitch in the 1st loop of the chain 3
inc : increase
BLO : back loops only
R : round / row

How to make an adorable crochet Shoji Lamp
Bottom of the lamp
With your 5 mm crochet hook and cotton yarn:
Note: close round with a sl st every time.
Make a magic circle.
Round 1: 4 sc (4)
Round 2: 3 sc in a stitch x 4 (12)
R3: 1 sc, 3 sc in next stitch, (2 sc, 3 sc in next stitch) x 3, 1 sc (20)
R4: 2 sc, 3 sc in next stitch, (4 sc, 3 sc in next stitch) x 3, 2 sc (28)
R5: 3 sc, 3 sc in next stitch, (6 sc, 3 sc in next stitch) x 3, 3 sc (36)
R6: 4 sc, 3 sc in next stitch, (8 sc, 3 sc in next stitch) x 3, 4 sc (44)
R7: 5 sc, 3 sc in next stitch, (10 sc, 3 sc in next stitch) x 3, 5 sc (52)
R8: 6 sc, 3 sc in next stitch, (12 sc, 3 sc in next stitch) x 3, 6 sc (60)
R9: 7 sc, 3 sc in next stitch, (14 sc, 3 sc in next stitch) x 3, 7 sc (68)
R10: 8 sc, 3 sc in next stitch, (16 sc, 3 sc in next stitch) x 3, 8 sc (76)
Cut yarn and weave in ends.
Top of the lamp
The top should have a hole in the middle, and that’s how we will make it.
Ch 44, then sl st in the 1st loop of the chain.
Round 1: Ch 1 starting the same loop: 5 sc, 3 sc in next loop, (10 sc, 3 sc in next stitch) x 3, 5 sc (52)
Round 2: 6 sc, 3 sc in next stitch, (12 sc, 3 sc in next stitch) x 3, 6 sc (60)
R3: 7 sc, 3 sc in next stitch, (14 sc, 3 sc in next stitch) x 3, 7 sc (68)
R4: 8 sc, 3 sc in next stitch, (16 sc, 3 sc in next stitch) x 3, 8 sc (76)
Cut yarn and weave in ends.

The side panels
You will have to make 4 of them.
Ch 19, starting from the 2nd loop from the hook:
Row 1 to 3: 18 hdc (18)
Row 4 to 23: 2 hdc (2)
Cut yarn and weave in ends.
Return to row 3 on the other side and join yarn with a hdc.
Row 4 to 23: 2 hdc (2)
R24: 2 hdc, ch 14, 2 hdc (18)
R25 to 27: 18 hdc (18)
Cut yarn and weave in ends.


Sew each panel on a side of the bottom by going through the front loops of each one of them. You will find that the bottom’s sides have 18 stitches, sew the panel on them. Leave the one stitch of each corner unworked.


Once you have finished (or even before that), glue the tracing paper on the plastic piece. I personally folded the tracing paper in two to make it more opaque. Do it 4 times, then glue them on the panels. Make sure that the tracing paper faces the inside of the lamp, while the plastic piece is facing the outside of the lamp.


The Lid – How to crochet a shoji lamp
The bottom of the lid:
Make a magic circle.
Round 1: 4 sc (4)
Round 2: 3 sc in a stitch x 4 (12)
R3: 1 sc, 3 sc in next stitch, (2 sc, 3 sc in next stitch) x 3, 1 sc (20)
R4: 2 sc, 3 sc in next stitch, (4 sc, 3 sc in next stitch) x 3, 2 sc (28)
R5: 3 sc, 3 sc in next stitch, (6 sc, 3 sc in next stitch) x 3, 3 sc (36)
R6 to 7: 36 sc (36)
The top of the lid
Make a magic circle.
Round 1: 4 sc (4)
Round 2: 3 sc in a stitch x 4 (12)
R3: 1 sc, 3 sc in next stitch, (2 sc, 3 sc in next stitch) x 3, 1 sc (20)
R4: 2 sc, 3 sc in next stitch, (4 sc, 3 sc in next stitch) x 3, 2 sc (28)
R5: 3 sc, 3 sc in next stitch, (6 sc, 3 sc in next stitch) x 3, 3 sc (36)
R6: 4 sc, 3 sc in next stitch, (8 sc, 3 sc in next stitch) x 3, 4 sc (44)
R7: 5 sc, 3 sc in next stitch, (10 sc, 3 sc in next stitch) x 3, 5 sc (52)
R8: 6 sc, 3 sc in next stitch, (12 sc, 3 sc in next stitch) x 3, 6 sc (60)
The top ball
Make a magic circle.
Round 1: 6 sc (6)
Round 2: 6 sc inc (12)
R3 to R4: 12 sc (12)
Cut yarn and fill the inside of the ball with some polyester fiber. Then sew the ball in the center of the top of the lid.


Cut a piece of cardboard a little smaller than the size of the bottom of the lid then insert it inside of it, before filling some polyester fiber on top of it. Then sew the bottom under the top of the lid. You have to make sure that the top has a little bump on it thanks to the fiber inside the bottom.

The Legs – How to crochet a shoji lamp
Make a magic circle.
Round 1: 4 sc (6)
Round 2: (3 sc in a stitch) x 4 (12)
R3: 1 sc, 3 sc in next stitch, (2 sc, 3 sc in next stitch) x 3, 1 sc (20)
R4: 20 BLO sc (20)
R5 to 6: 20 sc (20)
Cut yarn and fasten off. Make 4 of them, put the bottle cap inside of them and sew them on the back of the bottom of the lamp.


Cut a piece of cardboard a little smaller than the bottom and glue it on it, on the inside of the lamp. This will make the inside bottom more solid and flat.

Now time to sew the corners of the lamp together.


After sewing the panels together, sew the top of the lamp around the sides, by going through the front loops again.

The 4 bars on the panel
The vertical ones
Ch 26, starting from the 2nd loop from the hook:
Row 1: 25 sc (25)
Cut yarn and fasten off. Make 4 of them.
The horizontal ones
Ch 15, starting from the 2nd loop from the hook:
Row 1: 14 sc (14)
Cut yarn and fasten off. Make 4 of them.
Now sew 2 of each, on two opposite panels to recreate this design:

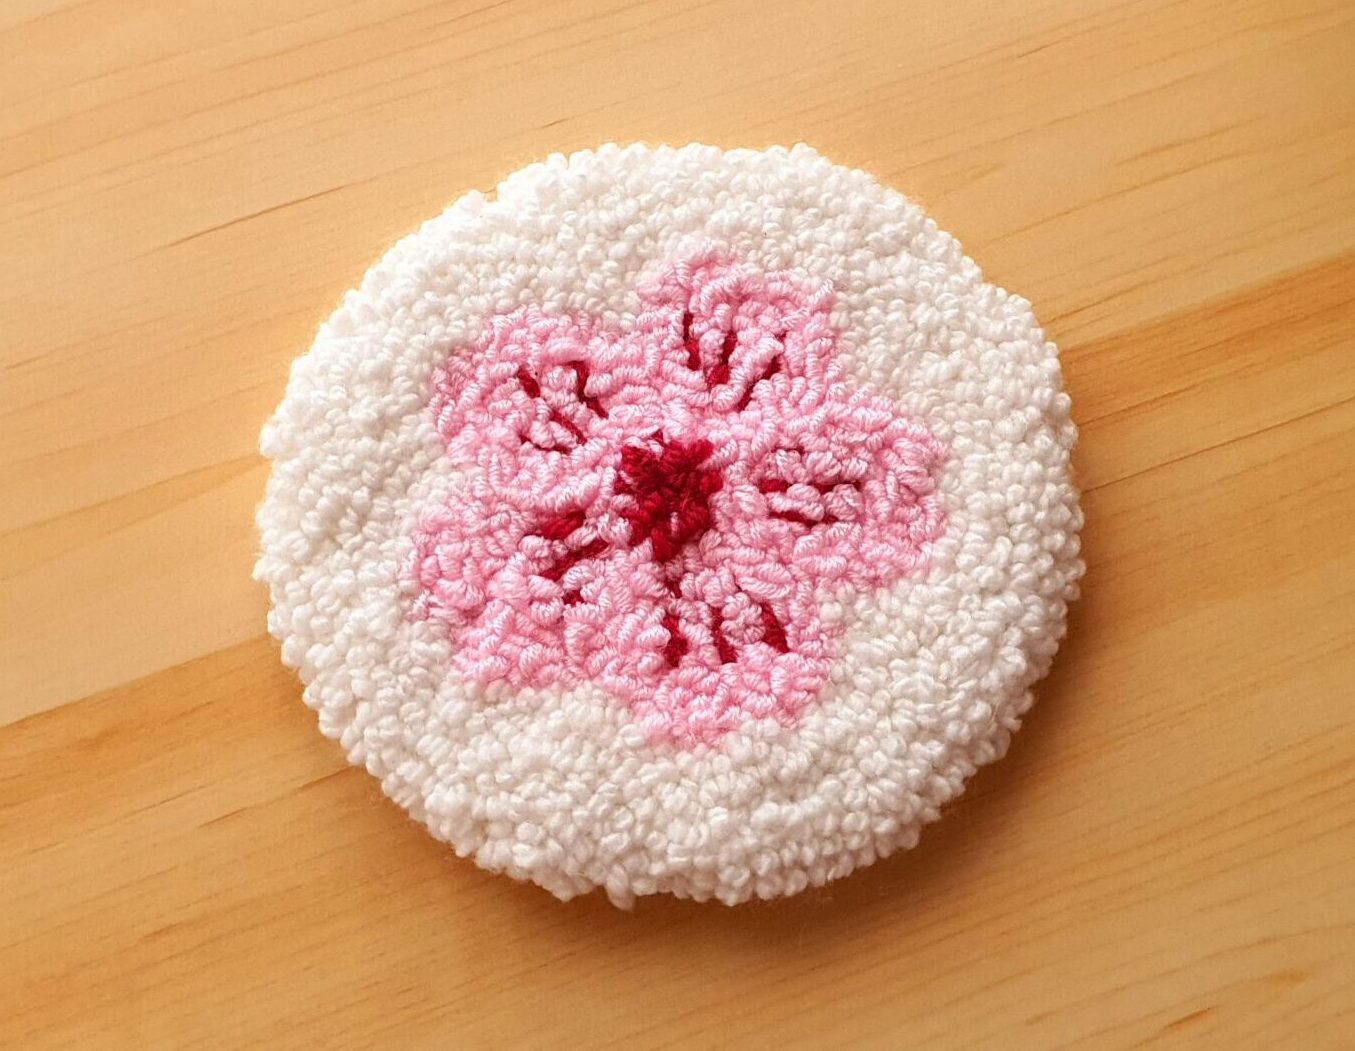
The Cherry Blossom Flowers
For this, we will need our 3 mm crochet hook and the pink amigurumi yarn.
In order to make our flower, will make each petal separately first, then sew them together on one common round base.
Ch 5, starting from the 2nd loop from the hook:
Round 1: 1 hdc, 2 dc in next stitch, (1 tr, 2 dc) in next stitch, (1 tr, sl st, 1 tr) iun the last stitch of the chain, continue working the next stitches on the other side of the chain base: (2 dc, 1 tr) in the next stitch, 2 dc in next stitch, 1 hdc, ch 1 then sl st in the 1st hdc of the round (15)
Then cut the yarn and fasten off. Make 5 of them.

The middle of the flower
Make a magic circle.
Round 1: 5 sc then finish with an invisible join. (5)
Cut yarn and weave in ends.
On each stitch, sew a petal.

With the DMC thread, sew the follicles on each petal. Make 4 flowers this same way.

Final Touch on How to crochet a shoji lamp
To finish your Shoji Lamp, sew the flowers on the panels with the bars the way that you like. Add your light inside the lamp, and you will finally be done! And this is how to make a crochet shoji lamp.

You will find on my tiktok profile a short video about the process of making this adorable shoji lamp (psst you can also follow me there, that would be highly appreciated). It looks way more complicated that it really is, although I don’t recommend this project for a new beginner. Tell me what is your favorite countries and how they inspire you in the comments down below. I would love to know!
Don’t forget to share this article on your social medias and let people know how they can make a crochet shoji lamp!


0