
Crochet is an age-old craft that has experienced a recent resurgence in popularity. As people seek out ways to slow down and disconnect from the digital world, crochet offers a tangible and satisfying way to create something beautiful and unique. Looking to the past for inspiration, I have curated a collection of retro crochet patterns that are sure to bring a touch of nostalgia to your life: from the Gameboy Phone case pattern to the Retro Mixtape Wallet design. In this article, we will explore a new fun and funky retro crochet pattern that is sure to delight: the Retro Record Player support and its vinyl records coasters. So, grab your crochet hook and get ready to transport yourself back in time with this fun and functional pattern.

Material – Crochet Retro Record Player
- Acrylic DK yarn: light purple, pink, mint, white cream
- Cotton DK yarn: mint, light pink, hot pink, light purple, white
- a 4 mm crochet hook
- a blue pastel felt fabric
- polyester fiberfill for stuffing
- 4 plastic bottle caps, same size
- craft wire 1,5 mm
- a little piece of cylindrical wood
- plastic canvas
- white fabric and DMC threads for the embroidery part
Abbreviations – Crochet Retro Record Player
ch : chain
sl st : slip stitch
sc : single crochet
hdc : half double crochet
inc : increase
dec : decrease
BLO : back loops only
R : row / round
Need help keeping track of your rows?
Try Froggit, my free crochet row counter you can use directly in your browser. It helps you track your rows, rounds, and project time while you crochet or knit; no download or account needed.
Try the Free Crochet Row CounterCrochet Retro Record Player
Top and Bottom of the record player
With the light purple acrylic yarn we will make 2 same rectangles for the top and bottom of the record player. Final dimensions will be: 17 x 13 cm.
Ch 41, starting from the 2nd loop from the hook:
Row 1 to 34: 40 sc (40)
Cut yarn and fasten off.

The sides of the record player
With the pink acrylic yarn we will make 2 same rectangles for the sides of the record player. Final dimensions will be: 13 x 4 cm.
Ch 31, starting from the 2nd loop from the hook:
Row 1 to 10: 30 sc (30)
Cut yarn and fasten off.

The front and back of the record player
For the front:
With the mint acrylic yarn, Ch 41, starting from the 2nd loop from the hook:
Row 1 to 2: 40 sc (40)
R3 to 8: 3 sc, change color to the white cream: 34 sc, change color back to mint: 3 sc (40)
R9 to 10: 40 sc (40)
Cut yarn and fasten off.

For the back:
With the mint acrylic yarn, Ch 41, starting from the 2nd loop from the hook:
Row 1 to 10: 40 sc (40)
Cut yarn and fasten off.

Both rectangles should be 17 x 4 cm.
Assembling the record player
We will start by sewing the bottom part together as show in the picture below.

Once done, lift up the corners and sew them with each other as shown below:


To harden the bottom, cut a piece of plastic canvas and insert it on the bottom of the record player. Then pick you top and sew it to the record player. You will have to insert some polyester fiber inside the record player before closing. Also insert another piece of plastic canva inside but at the top of the record player. This will keep your record player flat on the bottom and top of it.


The record player Arm
With the acrylic mint yarn, ch 5 and starting from the 2nd loop from the hook:
Please note that every round ends with a sl st in the 1st stitch of the round.
Round 1 : 3 sc, (3 sc in the last stitch), continue working on the other side of the foundation chain: 2 sc, (2 sc in the last stitch) (10)
Round 2 : sc inc, 2 sc, sc inc x 3, 2 sc, sc inc x 2 (16)
R3 to 6 : 16 sc (16)
R7 : sc dec, 2 sc, sc dec x 3, 2 sc, sc dec x2 (10)
R8 : sc dec, 3 sc, sc dec, 3 sc (8)
R9 : 2 sc, sc dec, 2 sc, sc dec (6)
Starting from here, we will work the next rounds in amigurumi style (no joining rounds at the end). Also fill the arm’s head with the polyester fiberfill before moving on to the next rounds.
R10 to 25 : 6 sc (6)
Insert a piece of craft wire inside the arm. Cut it to fit inside the arm.

R26 : sc dec x 3 (3)
Then close the hole with a sewing needle.

With the cotton light purple, make a magic circle:
Please note that every round ends with a sl st in the 1st stitch of the round.
Round 1 : 6 sc (6)
Round 2 : sc inc x 6 (12)
R3 : (1 sc, sc inc) x 6 (18)
R4 : (1 sc, sc inc, 1 sc) x 6 (24)
R5 : 24 BLO sc (24)
R6 : 24 sc (24)
R7 : 1 sc, 3 sl st, 9 sc, 3 sl st, 8 sc (24)
R8 : 1 sc, ch 5 skip the 3 previous sl st, 9 sc, ch 5 skip the previous 3 sl st, 8 sc (24)
R9 : 1 sc, 3 sc around the ch 5, 9 sc, 3 sc around the ch 5, 8 sc (24)
R10 to 11 : 24 sc (24)
Cut the yarn and fasten off.

Fill it with the polyester fiber and insert the arm inside. Then sew it to the record player on its right.

The Turntable
With the pink cotton yarn, make a magic circle (we’re working amigurumi style):
Round 1 to 6 : 4 sc (4)
Cut the yarn and insert a small piece of cylindrical wood inside, then glue the wood part on the record player, and sew the yarn part on it.


Take the felt fabric, and cut a round piece on it (12 cm of diameter). Then make a small hole on its center to fit the little piece we just made and slide it around it. Sew or glue the felt fabric on to the record player.


The record player feets
With the pink cotton yarn, make a magic circle (we’re working amigurumi style):
Round 1 : 6 sc (6)
Round 2 : sc inc x 6 (12)
R3 : (1 sc, sc inc) x 6 (18)
R4 : (1 sc, sc inc, 1 sc) x 6 (24)
R5 : 24 BLO sc (24)
R6 to 8 : 24 sc (24)
Cut the yarn and fasten off. Make 4 of them. Insert the plastic bottle caps inside, then sew them under the record player.


Decorate the front of the Crochet Retro Record Player
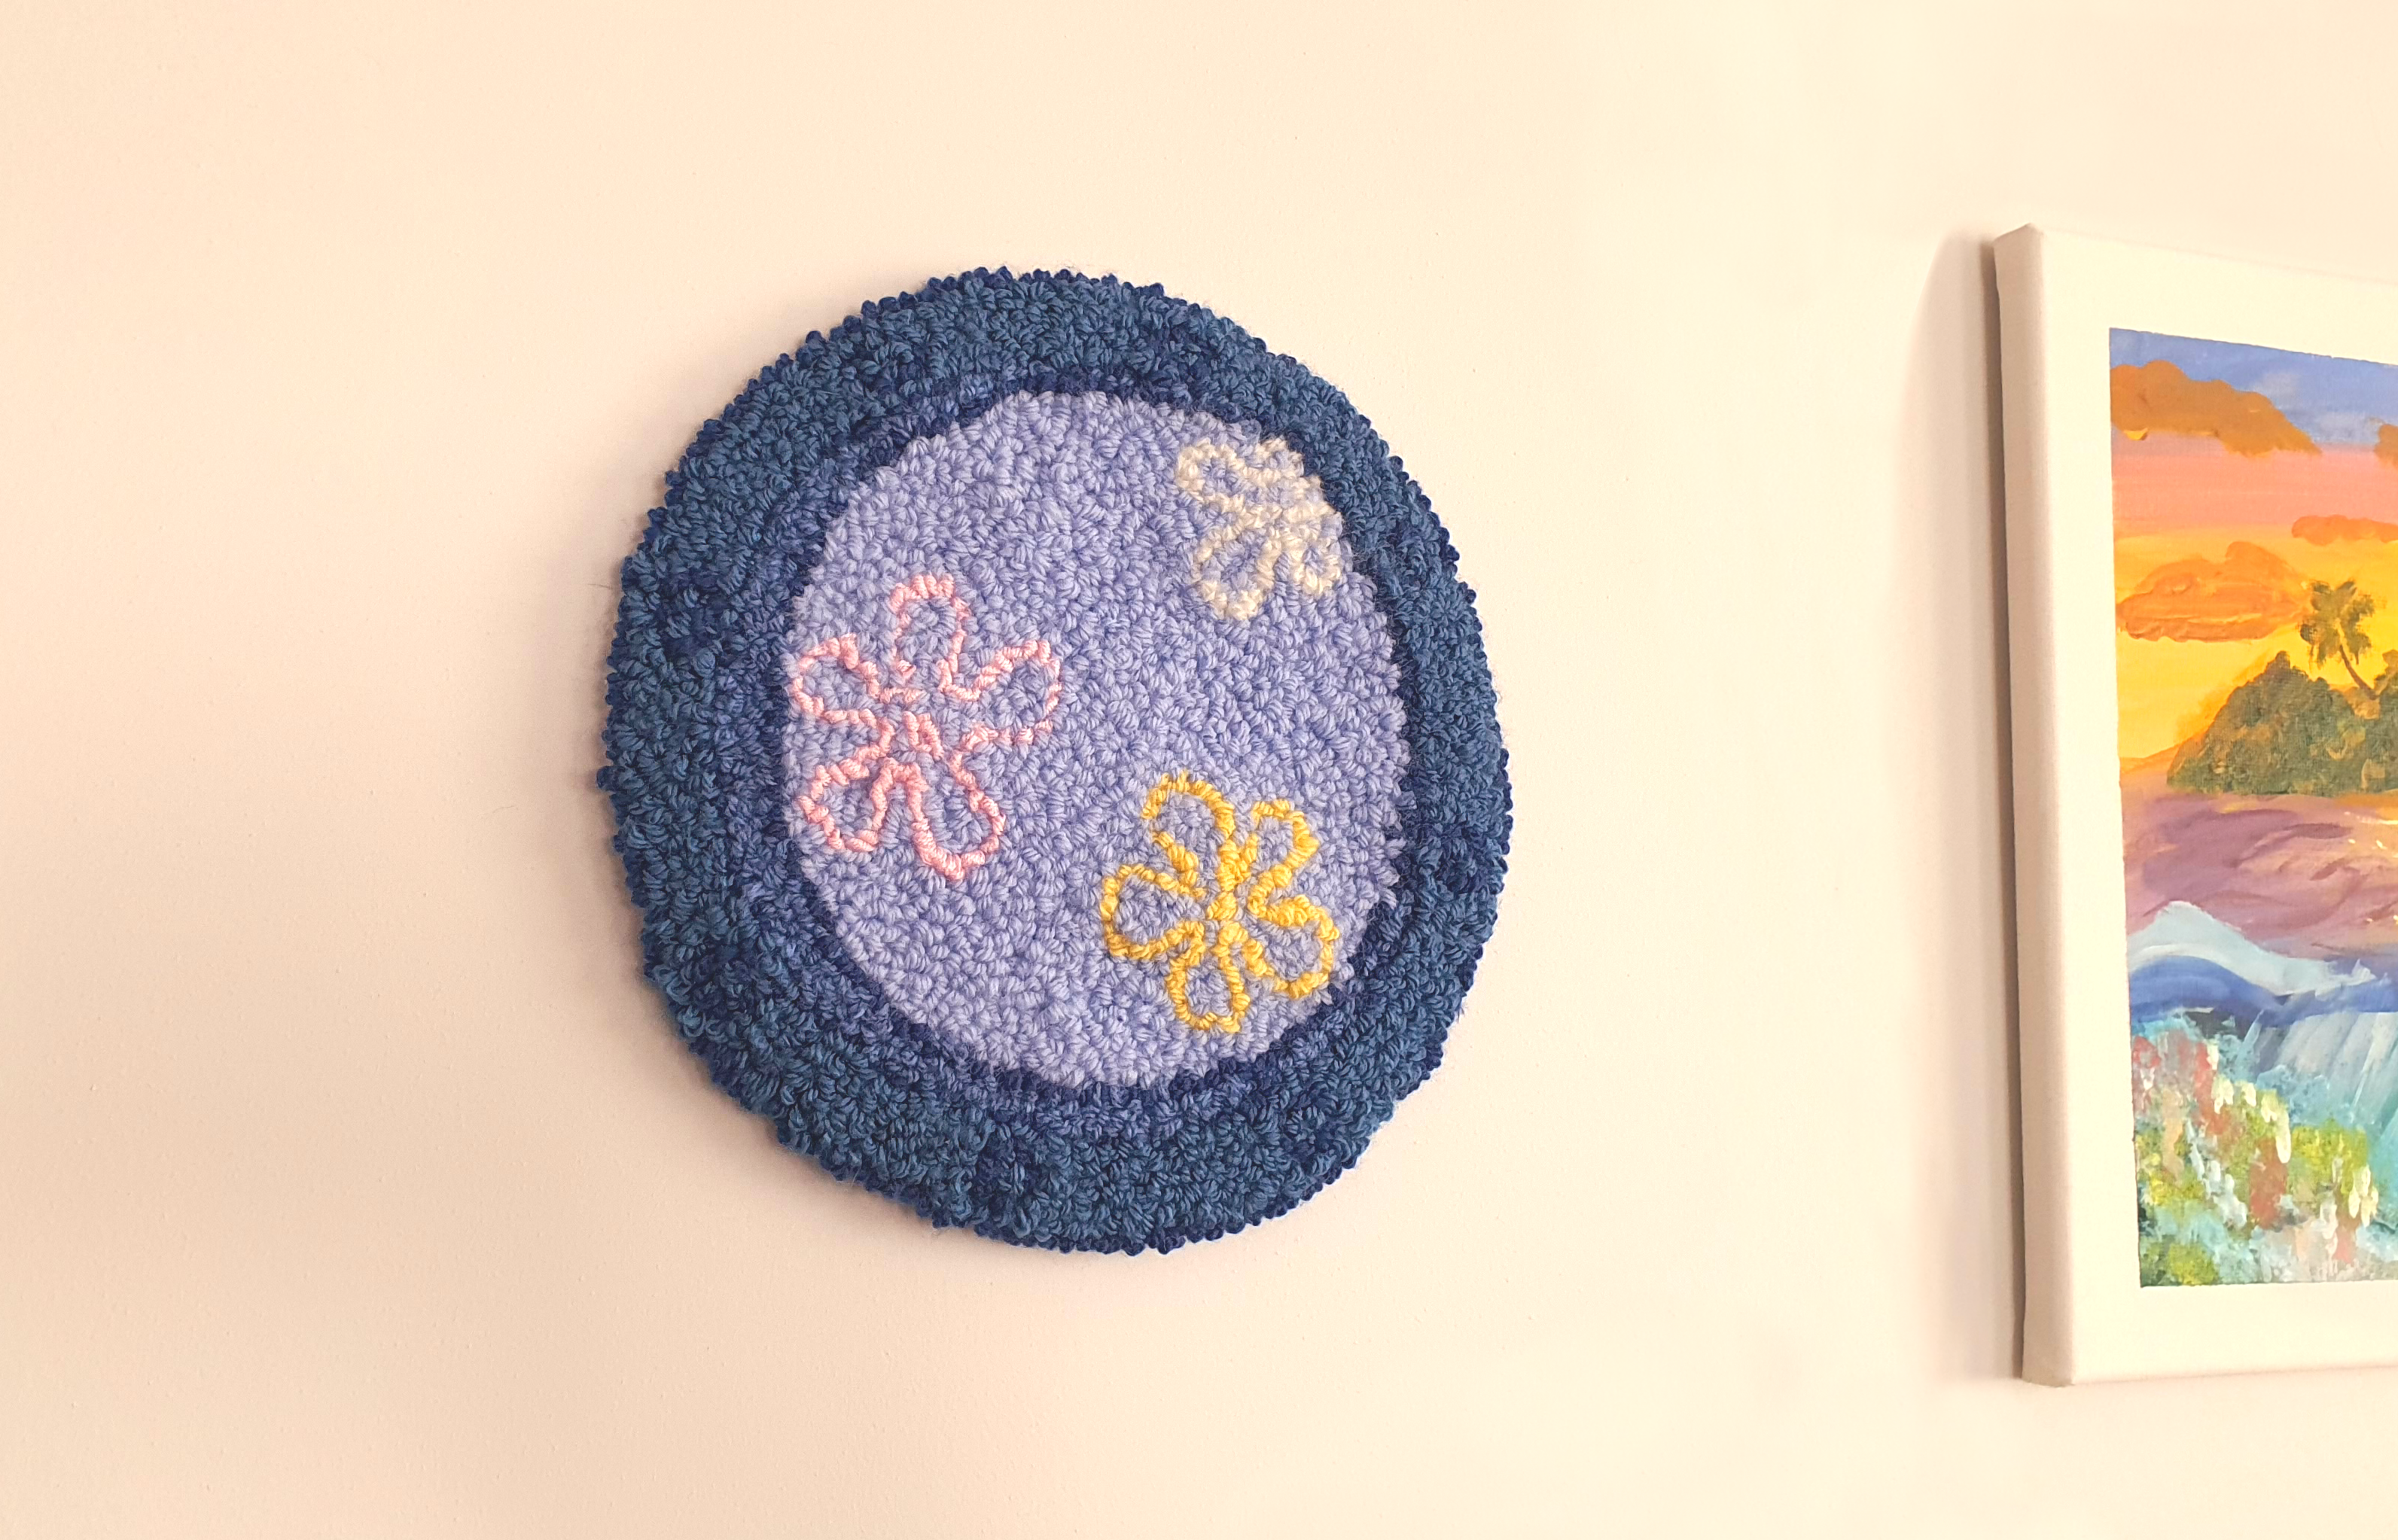
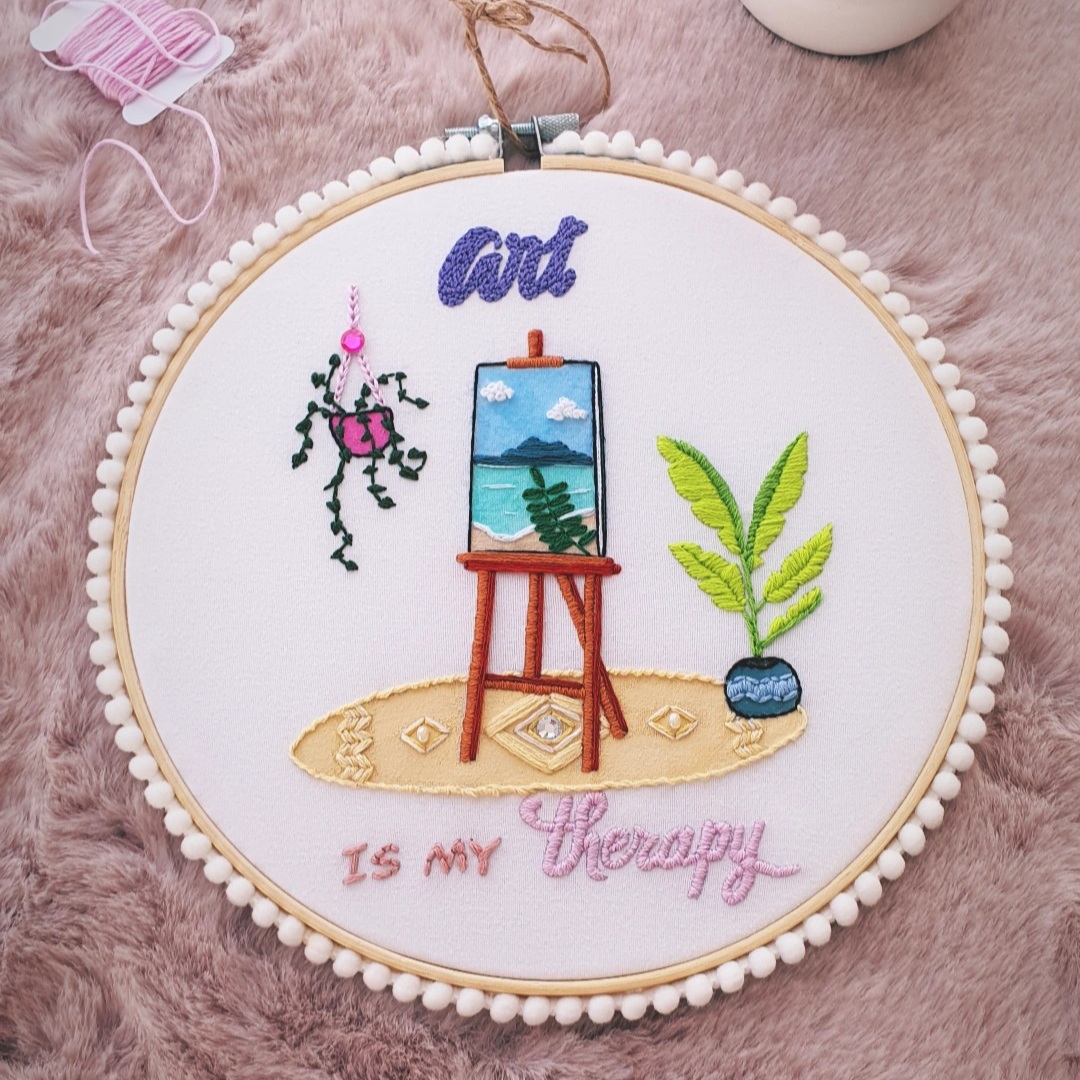
You can embellish the front of the record player the way you wish. I personally embroided something on a cotton fabric, which I dyed with watercolor painting to give the background a gradient effect, then sewn it on the white cream yarn space (the illustration pdf is available on my Ko-Fi shop for free if you want to reproduce the same decor as me).
You can, for example, crochet some flowers then sew them on the front. Let your imagination and creativity speak for themselves!

The vinyl discs that will serve as coasters
With the white cotton yarn, make a magic circle (please note that we will join rounds with a sl st everytime):
Round 1 : 10 hdc (10)
Round 2 : hdc inc x 10 (20)
R3 : (1 hdc, hdc inc) x 10 (30)
R4 : (2 hdc, hdc inc) x 10 (40)
Change yarn to your 2nd chosen color (mint or pink for example):
R5 : (3 hdc, hdc inc) x 10 (50)
R6 : (4 hdc, hdc inc) x 10 (60)
R7 : (5 hdc, hdc inc) x 10 (70)
R8 : (6 hdc, hdc inc) x 10 (80)
R9 : (7 hdc, hdc inc) x 10 (90)
R10 : (8 hdc, hdc inc) x 10 (100)
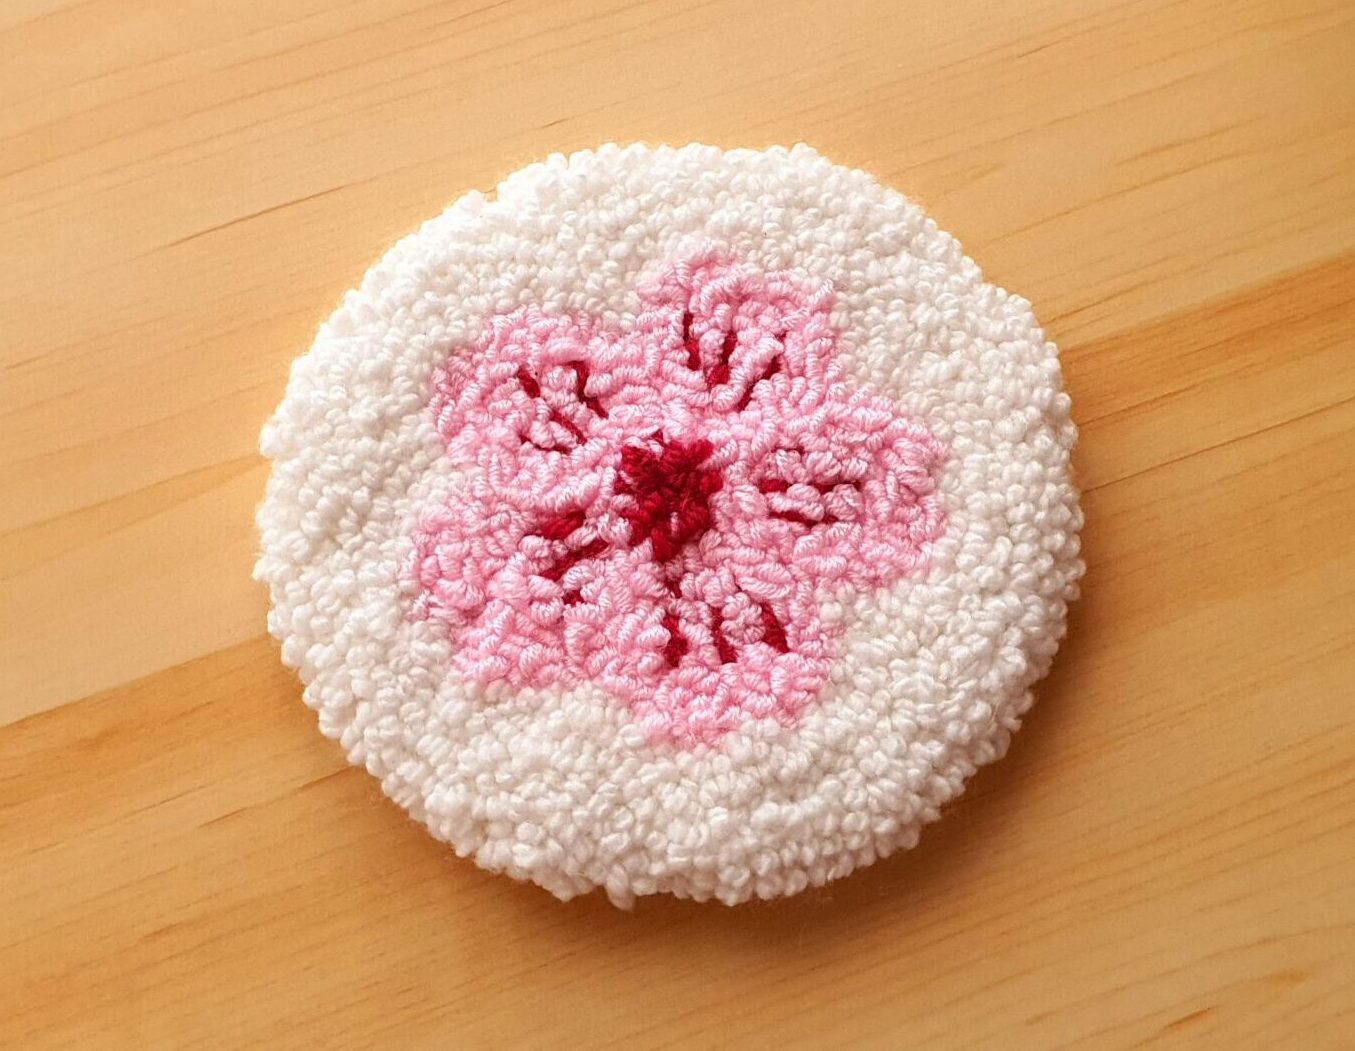
Cut yarn and weave in the ends. You can embellish the disc with an embroidered label like I did (the illustration are available on the previous PDF). Make 2 vinyl records coasters this way, you can make a 3rd one if you wish. The only left thing to do is insert your vinyls in your turntable and you’re done!

This crochet pattern for a record player coaster support is a fun and functional project for any vintage enthusiast. By following the simple instructions and using your favorite yarn colors, you can create a unique and practical accessory that not only looks great but also helps to protect your furniture from scratches and spills. Whether you make one for yourself or give it as a gift to a fellow vinyl enthusiast, this record player coaster is sure to be a hit! Happy crocheting!


How do I do the record player arm? I don’t understand how only a chain 5 can fit 3 sc, a stitch with 3 sc, 2 more sc and another stitch with 2 sc
Hello, this part is worked in the round, not back and forth in rows. Chain 5, then starting in the second loop from the hook, make 3 sc, then 3 sc in the next stitch, which is the last free loop. Continue along the other side of the foundation chain with 2 sc, then make 2 sc in the last stitch. I’m going to add it to the pattern to make it clearer.