
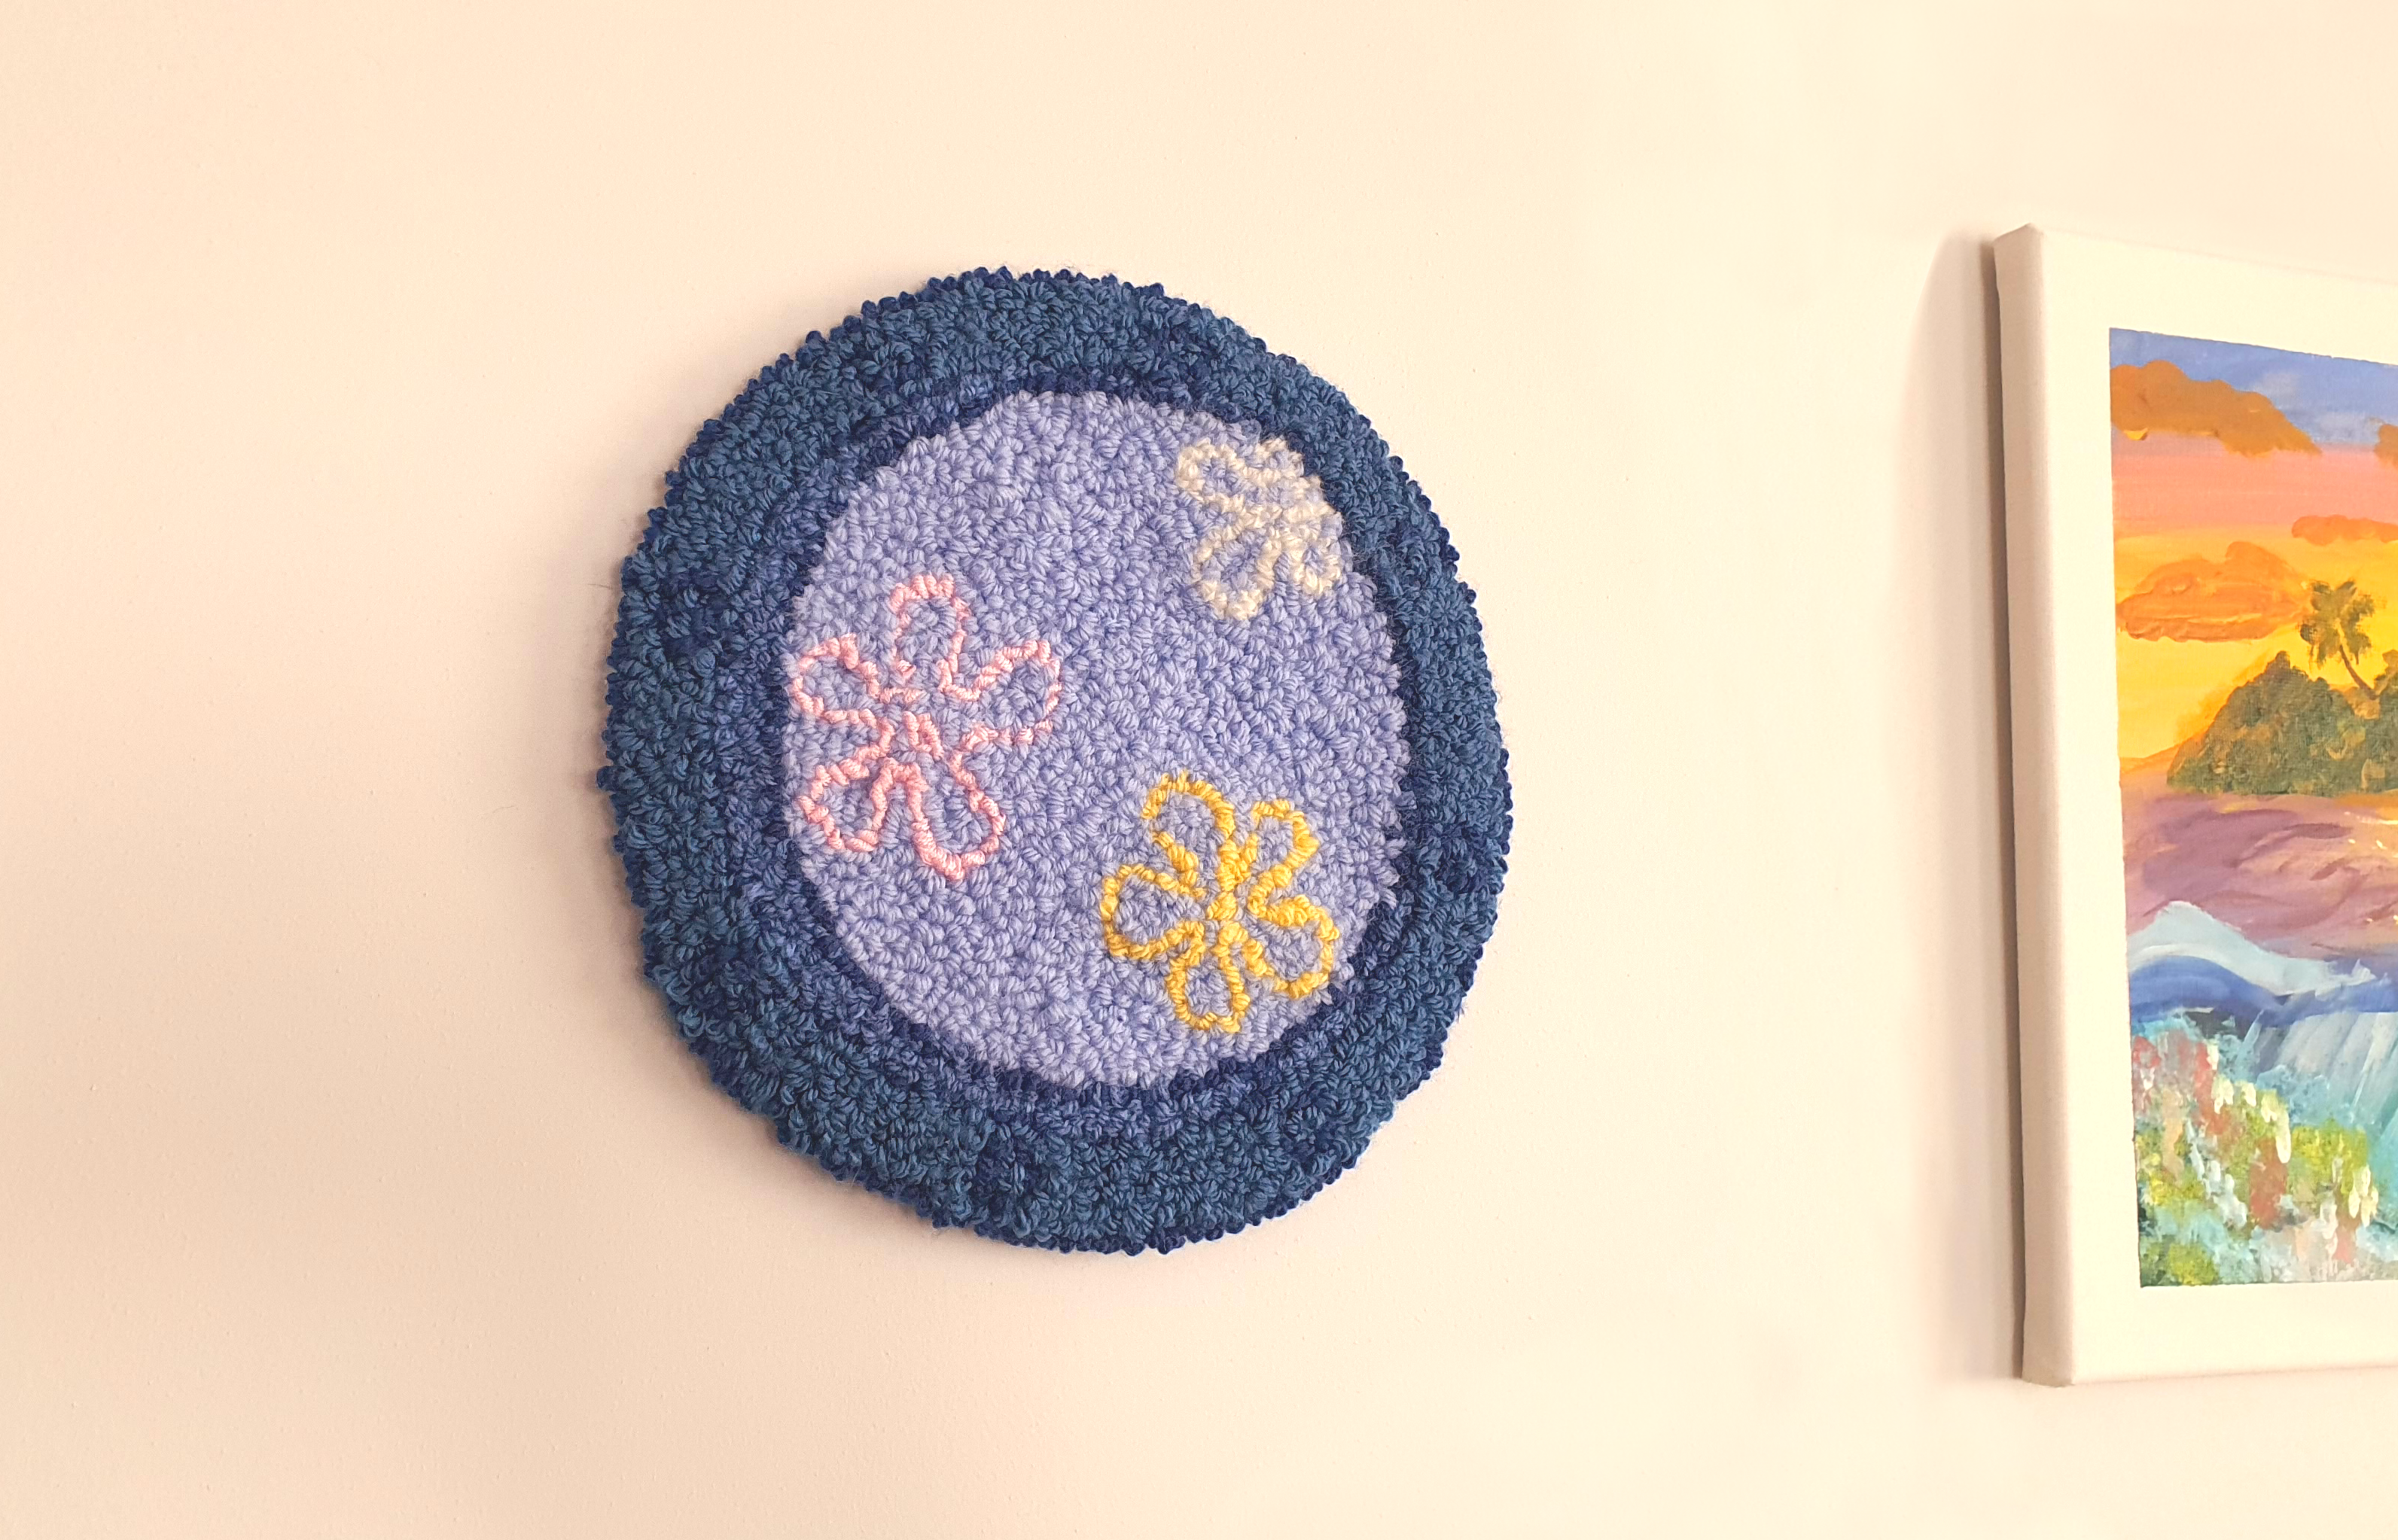
After making my Cherry Blossom bonsai amigurumi tree, I got inspired to make a flower as a coaster. Punch needle was the ideal support to realize what I had in mind. So I designed, a rather simple yet cute cherry blossom flower for my punch needle coaster. And here I am sharing it with you for free!

How to get your free pattern?
To get your free punch needle design pattern, you must download the pdf on my Ko-Fi shop by clicking this link: Cherry Blossom Flower Coaster Punch Needle Design
Then enter 0 in the “I want this” box, you will need to fill in the email adress form, and then you will be able to get your pdf pattern for free.
What to do when you have downloaded the pdf pattern
Once you have the pdf in hand, print in on a A4 piece of paper, no resizing needed, the illustration is made to be 13 cm in diameter.
Transfer the design on to your punch needle’s fabric (I recommend you monk cloth or aida cloth with high fabric count). Use an embroidery hoop to tighten your fabric before tracing, in order to keep the design from being distorted. You have different ways to do so:
- carbon paper
- water soluble fabric pencil
- water soluble marking pen
- iron-on transfer pencil
- or a simple and regular pencil since the design will be hidden under the yarn.
You can use a LED light board or just put your fabric on your paper, and place them on a window to use the daylight to trace the design.
Then you can start punch needling. I personally used a 3 mm needle. If you are a beginner, you can buy a kit here: https://amzn.to/3rfVEZ3

Where to start when punch needling the cherry blossom flower coaster
I started making the contour of the flower and worked around until I reach the middle. Here I switched colors and worked the middle of the flower and added the details inside the petals.
And just then to finish the coaster I worked the outside of the flower, in round.

How to finish
Cut the fabric around the finished coaster, leaving a 1 cm space of fabric around it.
With a brush and some fabric glue, secure the back of the coaster by gluing the yarn in the back. Then make some cuts around the 1 cm of fabric left, just some slight cuts without losing any piece of fabric. Those cuts are here to help fold the fabric on the back of the coaster, then glue it there.
Take a piece of felt fabric, cut a round of the same diameter as your coaster. You now have the choice to either sew the felt fabric under the coaster, or glue it.
If you liked my pattern, don’t forget to leave me a comment, I always love reading them. Also you can leave a star review on my Gumroad shop for the pattern, it’s highly appreciated. Share this pattern with your friends by clicking the share buttons down below!
Thank you!


0