
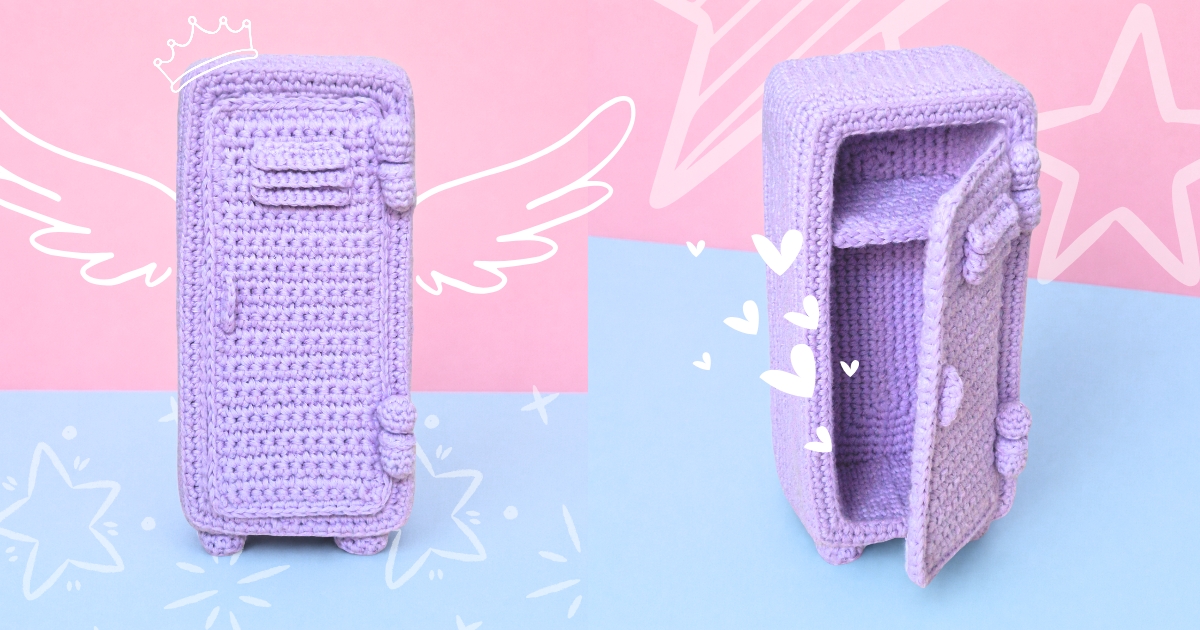
I didn’t grow up with school lockers, so this crochet locker pattern is basically me healing a very specific childhood injustice with yarn. I used to watch American movies, TV shows, and cartoons with those colorful hallway lockers and think they were the coolest thing ever. Where I lived, we didn’t have them at school, so I admired them from afar like they were some elite academic furniture. Years later, I finally made one myself, because apparently, the childhood locker envy was still quietly living rent-free in my brain.
This mini crochet locker is a tiny handmade version of that school hallway dream. It also works as a cute crochet desk organizer pattern, perfect for holding crochet hooks, notions, stationery, stickers, or all those tiny supplies that disappear the second you need them.
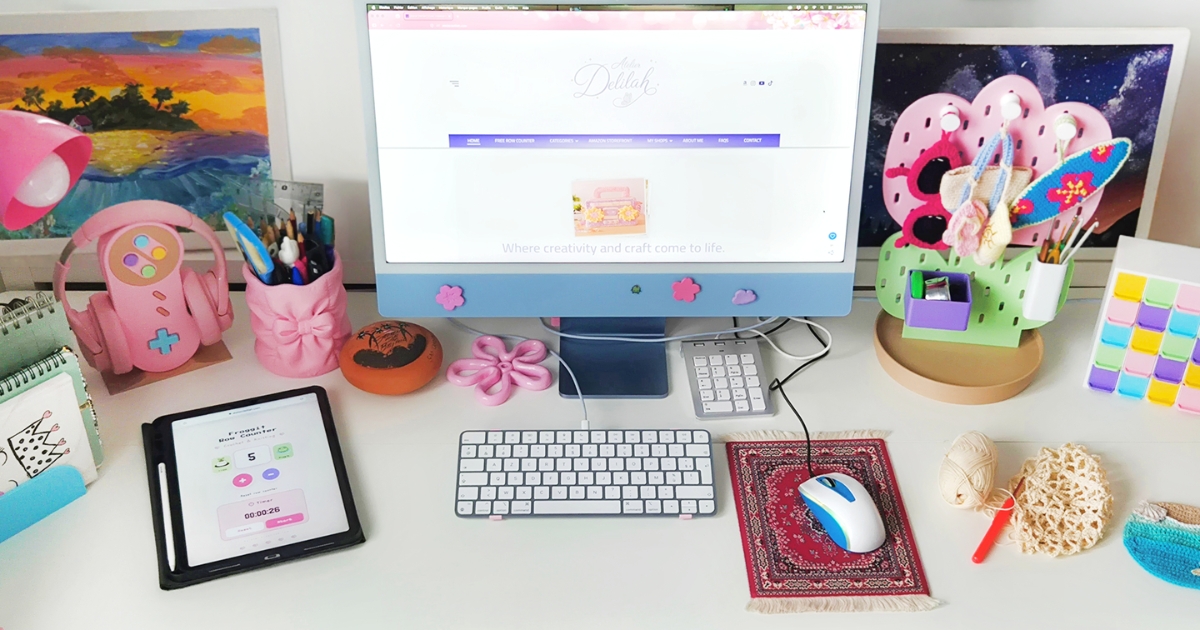
And yes, this project asked for commitment. I can officially say this little locker took me 24 hours, 31 minutes and 11 seconds to design and make from start to finish. I know because I tracked the whole process with Froggit, my free crochet and knitting row counter with a built-in timer.
It was honestly so useful for keeping track of my rows, timing the project, and discovering exactly how long one tiny yarn locker can take when it decides to become a full production.
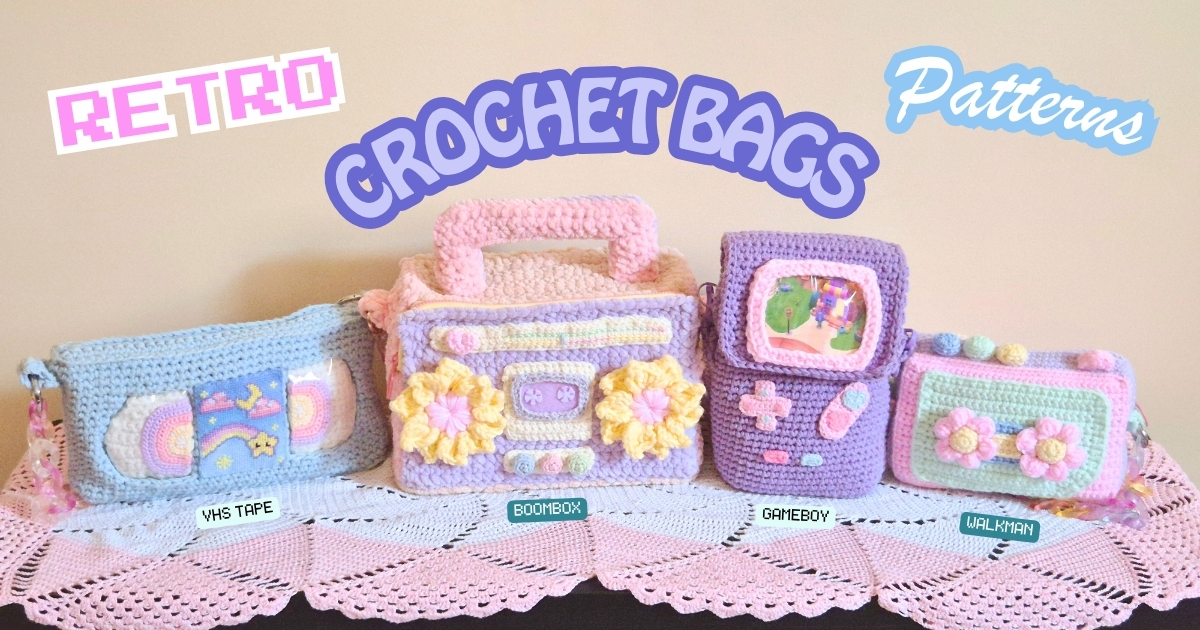
For me, this crochet school locker belongs in my retro crochet collection. Not because it looks old, but because it comes straight from those millennial childhood memories: watching American school scenes and thinking lockers were peak cool. So if you’re looking for a fun back to school crochet pattern, a cute mini crochet locker, or a handmade desk organizer that is actually useful, now it’s time to roll up your sleeves, and grab your hook. Let’s make the desk organizer little-me always wanted, but with yarn, because obviously that’s better.

Materials Needed
Abbreviations
ch: chain
sc: single crochet
sl st: slip stitch
hdc: half double crochet
dc: double crochet
inc: increase
dec: decrease
BLO: back loops only
FLO: front loops only
R: row/ round
Notes – Crochet Desk Organizer Pattern
Every round ends with a slip stich into the 1st stitch of the round. Every row ends with a chain 1, then turn.
The finished crochet mini locker measures approximately 10 cm wide, 21.5 cm tall, and 7 cm deep.
The gauge for the yarn is: 10 cm x 10 cm = 19 sc x 19 rows.
Need help keeping track of your rows?
Try Froggit, my free crochet row counter you can use directly in your browser. It helps you track your rows, rounds, and project time while you crochet or knit; no download or account needed.
Try the Free Crochet Row CounterCrochet Locker Pattern
With the 4 mm crochet hook, ch24, starting the 2nd loop from the hook:
Round 1: 22 sc, (3 sc in the next stitch), 21 sc, (2 in the last stitch) (48)
Round 2: (3 sc in the first stitch), 21 sc, (3 sc in the next stitch), 1 sc, (3 sc in the next stitch), 21 sc, (3 sc in the next stitch), 1 sc (56)
R3: 1 sc, (3 sc in the next stitch), 23 sc, (3 sc in the next stitch), 3 sc, (3 sc in the next stitch), 23 sc, (3 sc in the next stitch), 2 sc (64)
R4: 2 sc, (3 sc in the next stitch), 25 sc, (3 sc in the next stitch), 5 sc, (3 sc in the next stitch), 25 sc, (3 sc in the next stitch), 3 sc (72)
R5: 3 sc, (3 sc in the next stitch), 27 sc, (3 sc in the next stitch), 7 sc, (3 sc in the next stitch), 27 sc, (3 sc in the next stitch), 4 sc (80)
R6: 4 sc, (3 sc in the next stitch), 29 sc, (3 sc in the next stitch), 9 sc, (3 sc in the next stitch), 29 sc, (3 sc in the next stitch), 5 sc (88)
R7: 5 sc, (3 sc in the next stitch), 31 sc, (3 sc in the next stitch), 11 sc, (3 sc in the next stitch), 31 sc, (3 sc in the next stitch), 6 sc (96)
You should now have a rectangle measuring approximately 7 cm x 18 cm.
Round 8: FLO: 96 sc (96)
Round 9 to 19: 96 sc (96)
Your piece should now measure approximately 5.8 cm in height. It is important to keep the joining seam as straight as possible at this stage: this is the spot where you slip stitch to join each round and begin the next one. Keeping it aligned will help the next part of the pattern match the rectangular shape of the locker. If your joining seam is slightly shifted, like mine was, you can adjust the next round to balance it out: start the round with 7 sc and end with 6 sc, instead of starting with 6 sc and ending with 7 sc. This small adjustment helps bring the stitches back into better alignment.
Round 20: BLO: 6 sc, (3 sc in the next stitch), 33 sc, (3 sc in the next stitch), 13 sc, (3 sc in the next stitch), 33 sc, (3 sc in the next stitch), 7 sc (104)
Round 21: 7 sc, (3 sc in the next stitch), 35 sc, (3 sc in the next stitch), 15 sc, (3 sc in the next stitch), 35 sc, (3 sc in the next stitch), 8 sc (112)
Round 22 to 34: 112 sc (112)
Cut the yarn and weave in ends.

Back Of The Mini Crochet Locker
Ch24, starting the 2nd loop from the hook:
Round 1: 22 sc, (3 sc in the next stitch), 21 sc, (2 in the last stitch) (48)
Round 2: (3 sc in the first stitch), 21 sc, (3 sc in the next stitch), 1 sc, (3 sc in the next stitch), 21 sc, (3 sc in the next stitch), 1 sc (56)
R3: 1 sc, (3 sc in the next stitch), 23 sc, (3 sc in the next stitch), 3 sc, (3 sc in the next stitch), 23 sc, (3 sc in the next stitch), 2 sc (64)
R4: 2 sc, (3 sc in the next stitch), 25 sc, (3 sc in the next stitch), 5 sc, (3 sc in the next stitch), 25 sc, (3 sc in the next stitch), 3 sc (72)
R5: 3 sc, (3 sc in the next stitch), 27 sc, (3 sc in the next stitch), 7 sc, (3 sc in the next stitch), 27 sc, (3 sc in the next stitch), 4 sc (80)
R6: 4 sc, (3 sc in the next stitch), 29 sc, (3 sc in the next stitch), 9 sc, (3 sc in the next stitch), 29 sc, (3 sc in the next stitch), 5 sc (88)
R7: 5 sc, (3 sc in the next stitch), 31 sc, (3 sc in the next stitch), 11 sc, (3 sc in the next stitch), 31 sc, (3 sc in the next stitch), 6 sc (96)
R8: 6 sc, (3 sc in the next stitch), 33 sc, (3 sc in the next stitch), 13 sc, (3 sc in the next stitch), 33 sc, (3 sc in the next stitch), 7 sc (104)
R9: 7 sc, (3 sc in the next stitch), 35 sc, (3 sc in the next stitch), 15 sc, (3 sc in the next stitch), 35 sc, (3 sc in the next stitch), 8 sc (112)
Cut the yarn, leaving a long tail for sewing. Your rectangle should measure approximately 9 cm x 19.5 cm.

Assemble the front and back of the crochet locker pattern together
Cut your plastic canvas pieces to fit the inside edges of each part of the crochet locker: the top, bottom, left side, and right side.
I recommend cutting two pieces for each section and layering them together to make the locker extra sturdy.
If your locker has the same dimensions as mine, your plastic canvas pieces should measure as follows:
For the back, the second piece should be cut slightly smaller than the first rectangle we made, which measured 7 cm x 18 cm. I don’t have the exact measurement because I forgot to measure it (sorry T_T) so use the rectangle as a guide and trim the piece until it fits neatly inside.
This is how you slide the plastic panels inside the locker:

Important step, don’t skip this part:
Sew or glue each plastic canvas panel to the crochet locker section it belongs to: top, bottom, left side, right side, and back. This will keep the locker sturdy and prevent the panels from shifting once everything is assembled.
For the back, the larger plastic canvas panel should be attached to the large back rectangle we made earlier. The smaller back panel should be attached to the back of the first rectangle, as shown in the photo above.
I recommend doubling the plastic canvas pieces for each section to make the locker extra firm. Each reinforced panel should be secured to the inside of the crochet locker, directly against the section it supports. This way, the structure stays neat, strong, and doesn’t wobble around like it’s had too much coffee.
If you’re using balsa wood, you don’t need to double the panels, as it is already sturdy enough on its own.
Once all the panels are secured in place, take the back piece of the locker and align it with the stitches from the last round of the front section. Sew both pieces together around the edges to close the back of the crochet locker.


To sew the front and back pieces together, insert your needle through both loops of the front section, then through the front loops only of the stitches on the back panel, as shown in the photo above.
Crochet School Locker Feet
Make a magic circle (you’re still using the 4mm crochet hook).
Round 1: 4 sc (4)
Round 2: 3 sc in each of the 4 stitches (12)
R3: BLO 12 sc
R4: 12 sc
Cut the yarn and leave a tail for sewing. Make 4 feet this way. Insert the polyester fiberfill inside each feet, then sew them on the bottom of the crochet locker.


The Crochet Locker Door
With the 4 mm hook, ch 13. Starting the 2nd loop from the hook:
Row 1 to 30: 12 sc (12)
You should now have a rectangle measuring approximately 6,5 x 15,6 cm.
Make two rectangles this way, for the first one cut the yarn and weave in the ends. For the second rectangle, do not cut the yarn. We will join the two rectangles together by working around their edges.
Cut a piece of plastic canvas measuring 5,7 cm x 15,2 cm.
Glue or sew it onto the rectangle that will face the outside of the locker, placing the plastic canvas on the wrong side of that rectangle so it will be hidden inside the door. Once the two crochet panels are joined, the plastic canvas should be sandwiched between them and not visible from either side.
Then, pick up your hook again, place the two rectangles together, and work around the edges by inserting your hook through the corresponding loops of both rectangles at the same time, like this:
ch 1, 1st side: 29 sc, ch1, bottom: 12 sc, ch1, 2nd side: 29 sc, ch1, top: 12 sc.
Please note: Before you finish joining the two door panels together, insert 2 magnets inside the door, positioning them at the same height as the shelf. Glue them securely in place so they stay hidden between the panels once the door is closed.


The Hinges
This time we will work with the 3 mm crochet hook. Make a magic circle.
Round 1: 6 sc (6)
Round 2: (1 sc, sc inc) x 3 (9)
R3 to 4: 9 sc (9)
Cut the yarn, fasten off and leave a tail for sewing. Cut two pieces of wooden dowel, each measuring 2 cm long. Glue one dowel inside each of the two lower hinges. Do not glue the dowels to the upper hinges, as they need to move freely so the door can open and close smoothly without getting stuck.
Sew the lower hinges to the right side of the locker front. Then sew the upper hinges to the right side of the door.
Make sure the hinges are perfectly aligned before securing them. The upper hinges on the door should slide neatly over the lower hinges on the locker front, allowing the door to sit straight and open and close smoothly.


During the design process, I noticed that the door needed to be leveled between the hinges. Without this extra support, it didn’t sit properly inside the front opening of the locker. I made two small round spacers to help align the door with the locker front and keep it opening and closing smoothly. This is how I made them: with the 3 mm crochet hook make a magic circle, then 8 sc inside that circle, leave a hole int the middle of the circle to let the wooden dowel pass. Cut the yarn and weave in ends. Then sew or glue the spacers on top of the lower hinges.


The Ventilation Slits
With the 3 mm crochet hook, chain 9. Starting the 2nd loop from the hook:
Row 1: sc inc, 6 sc, sc inc (10)
Row 2: BLO: 10 sc (10)
Fasten off, leaving a long tail for sewing. Make 3 ventilation slits the same way.
Sew the ventilation slits onto the upper part of the locker door. Attach only the top edge of each slit to the door, leaving the bottom edge slightly raised so it rests over the slit below it. This creates a layered effect, like real locker vents.
Place the slits one under another, making sure they are evenly spaced and aligned before sewing them in place.


Locker Door Handle
With the 3 mm crochet hook, chain 7. Starting the 2nd loop from the hook:
Row 1: 1 sc, 1 hdc, 2 dc, 1 hdc, 1 sc (6)
Cut the yarn and leave a tail for sewing. Sew the handle to the left side of the door.


The Shelf – Back To School Crochet Pattern
With the 4 mm crochet hook, Ch14. Starting the 2nd loop from the hook:
Row 1 to 9: 13 sc (13)
Cut the yarn and weave in the ends. Make two shelf panels the same way.
Cut a piece of plastic canvas to fit inside the shelf, approximately 3.8 cm x 6 cm. Place the plastic canvas between the two crochet panels to reinforce the shelf.
Before sewing the shelf panels together, position the 2 remaining magnets along the front edge of the shelf, where the door will touch when it closes. Make sure the magnets are facing the correct way so they attract the magnets inside the door. Test them first before gluing, if they are facing the wrong direction, they will repel each other instead of closing properly.
Place the magnets as close to the front edge of the shelf as possible. If they are set too far back, they may not reach the magnets inside the door and the door will not stay closed properly.
Once the magnets are correctly positioned, glue them securely in place inside the shelf. Then sandwich the plastic canvas between the two crochet panels and sew the shelf panels together.
When the shelf is finished, sew it inside the crochet locker.


Now simply place the door onto the lower hinges, close it, and voilà! Your crochet locker is ready to display on your desk and use as a cute little storage organizer.


How cute is this little desk organizer? It gives you that sweet back-to-school flashback, minus the homework, thankfully, while keeping your hooks, notions, stationery, or tiny craft supplies neatly tucked away.
It was definitely not the easiest ride, but honestly? The result makes it worth every stitch and every “why did I choose to make a functional miniature locker out of yarn?” moment.
I hope you enjoyed this crochet locker pattern and enjoyed making this little masterpiece with me. Let me know in the comments below if you tried it: I would genuinely love to hear how yours turned out, what color you chose, and if you made any changes or customization.
Don’t forget to save this crochet locker pattern for later, share it with a crochet friend who loves unusual crochet projects, and tag me if you post your finished locker anywhere! I always love seeing your makes!
You can also find me on Instagram, Pinterest, TikTok, and YouTube if you’d like to keep up with my little crochet world and see what I’m currently making.
Until next time, happy crocheting!

































0