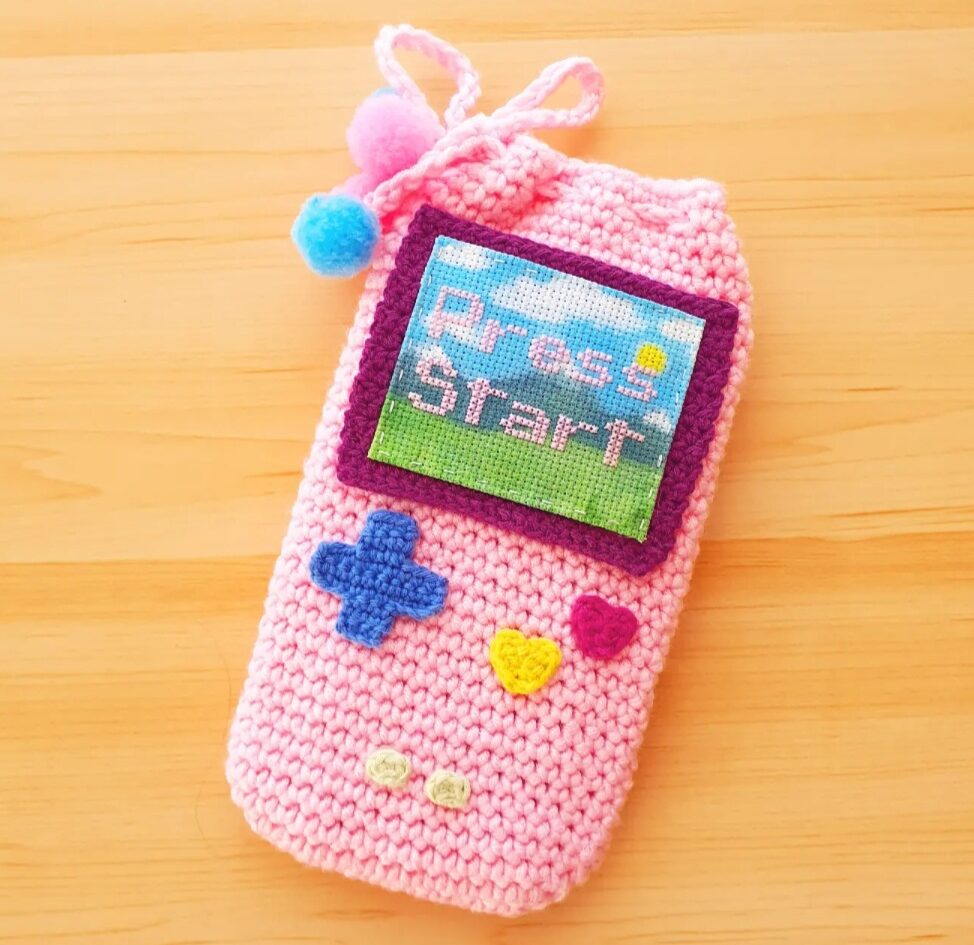
Some things from childhood just never leave us. The faint glow of a tiny screen, the clicky buttons under your thumbs, and those endless hours lost in pixelated adventures; they linger in memory no matter how much time passes. That’s exactly the feeling I wanted to capture with my crochet Gameboy bag pattern. It’s more than just a project: it’s a throwback, a little tribute to those afternoons stretched out on the couch or those long car rides where the only mission in life was to beat the next level.
While making this design, it hit me how perfectly it fits into crochet bag trends 2025; all about pieces that are fun, a little retro, and totally personal. Fashion now isn’t just about carrying an accessory, it’s about wearing something that makes people smile before you even open your mouth. And this bag? It does exactly that.
Think of it as the ultimate DIY crochet gamer girl style piece: bold enough to get noticed, nostalgic enough to make you smile, and practical enough to throw over your shoulder and take anywhere. And because I wanted this design to be just as useful as it is fun, I turned it into a crochet crossbody bag pattern you can actually wear every day, not just something that looks cute sitting on a shelf.
Now, enough talking, let’s get to work and make your next favorite crochet piece!
Materials Needed
Abbreviations
ch : chain
sc : single crochet
hdc : half double crochet
dc : double crochet
sl st : slip stitch
inc : increase
dec : decrease
sc3tog : a decrease of 3 single crochet together
R : round / row
Notes – Crochet Crossbody Bag Pattern
Every round ends with a slip stitch into the first stitch of the round. Every row ends with a chain 1 then turn.
Gauge for the main yarn (with 2 strands of yarn held together and a 5 mm hook): 16 sc × 18 rows = 10 × 10 cm.
The finished crochet crossbody bag measures approximately 20.5 cm in height, 14 cm in width, and 5.5 cm in depth.
I recommend placing a piece of plastic canvas at the bottom of the crochet gameboy bag to give it structure, so it won’t sag when filled and will stay firm and sturdy.

Crochet Gameboy Bag – Crochet Gamer Bag Pattern
Crochet Gameboy Bag Main Body
Chain 13, starting the 2nd loop from the hook:
Round 1: 11 sc, (3 sc in the last loop), continue working on the other side of the chain base: 10 sc, 2 sc in the last loop of the round) (26)
Round 2: (3 sc in the first stitch), 10 sc, (3 sc in the next stitch), 1 sc, (3 sc in the next stitch), 10 sc, (3 sc in the next stitch), 1 sc (34)
R3: 1 sc, (3 sc in the first stitch), 12 sc, (3 sc in the first stitch), 3 sc, (3 sc in the first stitch) 12 sc, (3 sc in the first stitch), 2 sc (42)
R4: 2 sc, (3 sc in the first stitch), 14 sc, (3 sc in the first stitch), 5 sc, (3 sc in the first stitch) 14 sc, (3 sc in the first stitch), 3 sc (50)
At this stage, the base of the crochet gameboy bag measures 11.5 cm by 5.7 cm.
R5 to 25: 50 sc (50)
At this point, the height of the bag is 12.2 cm.
Next, divide the bag (with stitch markers) into four sections: front, back, and two sides. The front and back should each have 18 stitches, and each side should have 7 stitches. See the picture below for a visual guide.

Join the yarn with a single crochet in the first stitch of the 18 stitches front section, then continue the next rows as follows:

Row 26 to 34: 18 sc (18)
Fasten off and weave in the ends. Repeat the same for the back section.


The sides are left unworked for now, as this is where we’ll be attaching the zipper. At this stage, the bag measures 18 cm in height.
Pro Tip
To keep the look of the crochet gameboy bag uniform with the base (which was worked in continuous rounds), I recommend cutting the yarn at the end of each row and rejoining it at the first stitch of the previous row. This way, all rows will show the front of the stitches, giving the bag a consistent, even appearance.
If you were to work in regular back-and-forth rows (ending with a ch 1 and turning), one row would show the front of the stitches and the next would show the back, creating a less uniform finish.

The Gameboy’s Buttons
The Heart Shaped Buttons
With your DMC thread (6 strands) and the 2,5 mm crochet hook, make a magic circle.
Round 1: 1 sc, 2 hdc, 3 dc, ch 2, sl st, ch2, 3 dc, 2 hdc, sl st into the 1st sc of the round.
Pull the magic circle closed, cut the yarn, and fasten off, leaving a tail for sewing. Make two buttons in total.

The oval base for the buttons
With a sport weight cotton yarn and the 3 mm crochet hook, chain 9. Starting the 2nd loop from the hook:
Round 1: 7 hdc, (4 hdc in the last loop), continue working on the other side of the chain base: 6 hdc, (3 hdc in the last stitch). (20)
Round 2: hdc inc, 6 hdc, (hdc inc) x 4, 6 hdc, (hdc inc) x 3. (32)
Cut the yarn and finish the round with an invisible join, leaving a tail for sewing. Attach the two heart buttons on top, then sew the entire piece onto the bag in its proper place.

The Select/ Start buttons
With the dmc thread (6 strands) and the 2,5 mm crochet hook, chain 5.
Round 1: 3 sc, (3 sc in the last loop), continue working on the other side of the chain base: 2 sc, (2 sc in the last stitch). (10)
Cut the yarn, leaving a tail for sewing. Make two buttons in total and sew them to the front of the bag in their designated spots.

The Cross – crochet bag trends 2025
For the cross, I followed the same pattern I used in my Gameboy Phone Case design. You can find it there, along with a step-by-step video tutorial. For this part, use sport weight cotton yarn with a 3 mm crochet hook. To finish, add small details like the arrowheads on each side using DMC thread. Sew the cross onto the lower left part of the crochet gameboy bag’s front panel.

Zipper bands – DIY crochet gamer girl style
Back to the main yarn and the 5 mm crochet hook. Chain 37, then starting the 2nd loop from the hook:
Row 1 to 2: 36 sc (36)
Cut the yarn and fasten off, leaving a short tail for sewing. Make two bands in total. Sew the zipper between them, making sure it lines up so that the center of the zipper is equal to 3 stitches, while each band corresponds to 2 stitches. This way, the entire piece will fit neatly into the 7 stitches left unworked on the sides. Next, attach the piece to the side of the bag. Work through both loops of the bag’s stitches, while only using the front loops of the zipper bands.


Pro Tip
Here’s how I sewed the zipper: I first attached one band to the bag, then sewed one side of the zipper onto that band. By doing it this way, the zipper naturally followed the shape of the bag’s opening, without being stretched or distorted at the corners. If I had sewn it flat from the start, the corners would have created folds, and I would have had to undo and readjust the zipper to give it more length. Once the first side was secure, I sewed the other side of the zipper onto the second band, and finally, I attached the second band to the crochet crossbody bag.
Once all the parts are sewn together, close the small gaps where the bag’s main body meets the sides of the zipper bands, so the opening is fully sealed.


The Bag Flap
Again with the main yarn and the 5 mm crochet hook. Chain 19, then starting the 2nd loop from the hook:
Row 1: sc inc, 16 sc, sc inc (20)
Row 2 to 33: 20 sc (20)
Row 34: sc3tog, 14 sc, sc3tog (16)
Now we’ll work around the flap edge by slip stitching all the way around. Finish with an invisible join and weave in all ends. The front of the flap corresponds to where you ended the flap (Row 34), while the back of the flap, where it will be sewn to the bag, starts at Row 1.
Attach the top part of the magnetic snap button to the front of the flap, placing it in the center as shown in the picture below. Make sure it’s facing the right way, so the snap will close onto the other part from the inside of the flap.


Sew the flap to the back of the bag, aligning the bottom edge of the flap with Row 26 of the bag’s body. Stitch it securely in place along the back. When you’re done, sew the second part of the snap button onto the main body of the bag, making sure it aligns perfectly with the part attached to the flap.

The Strap Tabs
With the main yarn and the 5 mm crochet hook. Chain 4, then starting the 2nd loop from the hook:
Row 1 to 8: 3 sc (3)
Fold the tab in half and join the first and last rows together with 3 slip stitches across the 3 stitches. Cut the yarn, leaving a tail for sewing. Make two tabs in total and attach them to each side of the bag, 5 rows below the zipper. Insert the round clips through them.


The Gameboy Screen
The Back Of The Screen
With the worsted weight yarn and the 4 mm crochet hook, chain 15. Starting the 2nd loop from the hook:
Row 1: sc inc, 12 sc, sc inc (16)
Row 2 to 12: 16 sc (16)
Row 13: sc dec, 12 sc, sc dec (14)
Cut the yarn and leave a tail for sewing. The back of the screen measures 9.5 cm by 7.3 cm.

The Screen Frame
Using the same yarn and hook, chain 45 and slip stitch into the first chain to form a total of 46 loops. Work the round into the back loops of the chains as follows:
Round 1: (1 hdc, 1 sc) in the first loop (the one where we did our slip stitch), 12 sc, (1 sc, 1 hdc) in the next loop, 9 hdc, (1 hdc, 1 sc) in the next loop, 12 sc, (1 sc, 1 hdc) in the next loop, 9 hdc. (50)
Cut the yarn, leaving a tail for sewing, and finish the round with an invisible join for a neat finish. From the clear vinyl fabric, cut a piece to fit inside the frame and stitch it to the inner side. Next, sew the frame onto the back panel (leave the right side of the screen unstitched to create an opening for sliding images in), working only through the outer edges of the stitches so that a piece of paper can be slipped inside afterward.


Sew the finished screen to the center front of the flap, making sure it also covers the back of the snap button.

The last step is simply adding the chain strap and slipping a cute picture into the screen, and that’s it! Your crochet Gameboy bag is all set and ready to take with you wherever you go.


There’s always something special about finishing a project, tying off that last end and holding the final piece in your hands. This crochet Gameboy bag isn’t just another make to tick off the list; it’s something you can actually use, enjoy, and smile at every time you pick it up. It’s a bag with character, one that feels alive because you put the work into every stitch.
What makes it even better is how personal it can become. Swap in a favorite photo, doodle, or design for the screen, add a chain or strap you love, and suddenly the bag tells your story. That’s the beauty of crochet right now, and why it’s such a big part of crochet bag trends 2025; it’s creative, customizable, and full of personality.
And maybe that’s my favorite part of designing, knowing that once a pattern leaves my hook, it finds its way into your hands, your yarn baskets, your evenings spent creating. I love seeing how each of you makes these projects your own, and hearing the little stories that come with them. So if you do try this crochet Gameboy bag, don’t be shy, leave me a comment below: because reading your comments is one of the best parts of sharing my work.
If you want to keep up with what’s coming next, bookmark my website or come hang out with me on Instagram, Pinterest, TikTok, or YouTube. However you join in, I’m happy you’re here, and I can’t wait to see your creations. Until next time, happy crocheting!




























0